
As we age, our hair changes in texture and density, making it important to find styles that are both flattering and easy to manage. Whether you’re seeking convenience or a fresh new look, this listicle features eight low-maintenance hairstyles that will help seniors achieve and maintain volume.
1.Effortless Side Part
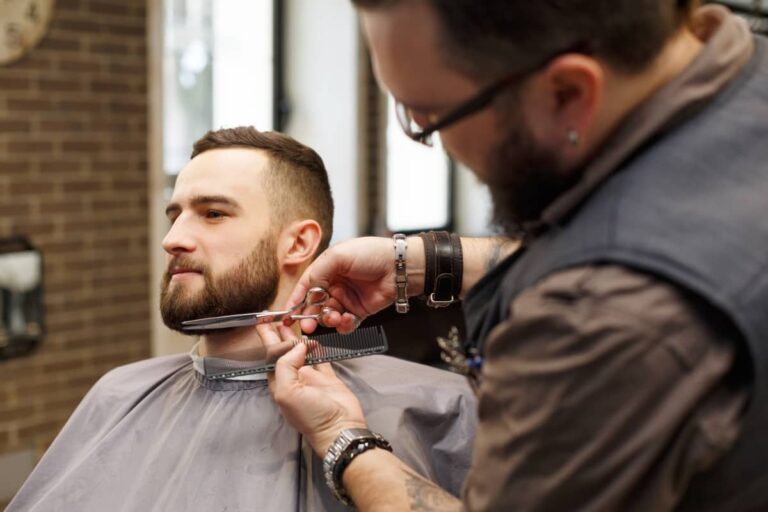
The side part is a timeless style that adds a touch of sophistication without requiring much extra effort, making it an ideal choice for seniors looking for a polished yet manageable hairstyle. This versatile cut can be adapted to suit various hair types and lengths, effectively enhancing volume and elegance.
How to Achieve It:
- Start with Clean Hair: Begin with freshly washed, towel-dried hair to ensure the best results. This provides a clean canvas for styling.
- Create the Part: Use a comb to create a deep part on one side. This adds asymmetry, which can visually lift the hair and lends an air of style.
- Blow-Dry for Volume: Blow-dry your hair using a round brush to add volume at the roots. Aim the dryer at the roots while lifting the hair with the brush, which will create lift and fullness.
- Finish with Hairspray: Once you’re satisfied with the volume and style, finish with a light-hold hairspray to secure everything in place without making it stiff.
Tips:
- Use Volumizing Mousse: For added volume, consider applying a volumizing mousse before blow-drying. This product binds to the hair shaft, creating a thicker appearance and increasing lift.
- Suitable for All Hair Types: This style works well for those with both thin and thick hair, providing a fuller appearance while remaining low-maintenance. It can also be easily adjusted by changing the depth of the part or the direction of the blow-drying.
With the effortless side part, seniors can enjoy a stylish, put-together look that enhances volume and complements their features, allowing them to feel confident without demanding extensive upkeep. This simple yet chic hairstyle can be expertly tailored at your local Phoenix Barbershop, where skilled barbers can provide personalized advice on the best haircut styles for you.
2.Classic Crew Cut
The crew cut is a no-fuss, timeless hairstyle that requires minimal upkeep while maintaining a neat and stylish look. This haircut is characterized by short sides and slightly longer hair on top, creating a polished appearance that is both practical and sharp.
How to Achieve It:
- Consult Your Barber: When visiting your barber, be clear about the length preferences for the top. Typically, you’ll want the sides kept short, around a #1 or #2 clipper guard, while leaving approximately an inch or so of length on top to allow for texture and styling.
- Texturising the Top: Once the cut is complete, use a small amount of styling gel or pomade to add some texture to the longer hair on top. This will enhance your hairstyle, making it more dynamic and preventing it from looking flat. Work the product through your hair using your fingers to create a tousled, lived-in vibe.
Tips:
- Adaptation for Face Shapes: This haircut is perfect for those who prefer a clean, sharp look without the hassle of daily styling. It’s versatile enough to suit various face shapes and hair textures, allowing you to tailor the amount of length on top or adjust the fade on the sides according to your preferences.
- Maintenance: To keep the crew cut looking fresh, regular visits to the barber every 4 to 6 weeks are recommended. This helps to maintain the shape and prevents the hairstyle from growing out too much, ensuring you always look sharp and presentable.
With its ease of maintenance and classic appeal, the crew cut is an excellent choice for anyone looking for a low-maintenance yet stylish haircut that can be effortlessly integrated into everyday life.
3.Textured Crop
The textured crop is a modern, stylish option that adds volume and is remarkably easy to maintain. This haircut, characterised by shorter sides and a slightly longer top, creates a relaxed yet purposeful appearance that is ideal for those seeking a low-maintenance style without sacrificing flair.
How to Achieve It:
- Start with Damp Hair: After washing, towel-dry your hair so it’s damp but not dripping. This is the perfect state for applying products, as it allows for better absorption and styling.
- Apply a Texturizing Product: Choose a lightweight texturizing cream or paste that suits your hair type. A small amount goes a long way—approximately a dime-sized amount should suffice. Rub the product between your palms and distribute it evenly throughout your hair, focusing on the tips for added definition.
- Tousle for Texture: Using your fingers, tousle your hair to create a messy yet controlled look. The aim is to enhance natural movement, giving your hair a voluminous appearance while keeping it looking styled but effortless.
- Drying Techniques: You have options here: allow your hair to air dry for a natural finish, or use a blow dryer on a low heat setting to add more volume and shape. If you opt for a blow dryer, use your fingers to lift the hair at the roots for maximum body.
Tips:
- Regular Trims: Schedule regular trims with your Phoenix Barber every 6 to 8 weeks. This will keep the edges clean and maintain the shape, ensuring the style looks fresh and contemporary. Regular maintenance is key to preserving the layered texture that makes this cut so appealing.
- Styling Versatility: The textured crop works well with different hair types, from straight to wavy. Consider experimenting with different texturizing products for various finishes, ranging from matte to shine, depending on your desired look.
With its ease of maintenance and contemporary style, the textured crop is an excellent choice for anyone looking to enhance their hairstyle with minimal effort.
4.Casual Brush Back
For a sophisticated yet low-maintenance look, the casual brush back is an excellent choice. This hairstyle exudes effortless elegance, making it perfect for both everyday wear and special occasions.
How to Achieve It:
- Start with Towel-Dried Hair: After washing your hair, gently towel dry to remove excess moisture. This ensures your hair is not dripping wet, which can weigh it down and affect the final style.
- Apply Styling Product: Use a small amount of styling cream or gel, roughly the size of a nickel, and warm it between your palms. This helps to distribute the product evenly without clumping. Focus on applying the product mainly to the roots and mid-lengths for hold and texture.
- Brush It Back: Take a fine-toothed comb and start brushing your hair back from the front towards the crown of your head. For added volume and lift, you can lift the hair slightly at the roots as you brush. This creates a smoother transition from the front to the back, ensuring a polished appearance.
- Drying Techniques: You have the option to either let your hair air dry for a more natural finish or use a blow dryer set on low heat to add extra volume and shape. If using a blow dryer, direct the airflow from the front to the crown while continuing to brush your hair back with your fingers or a comb.
Tips:
- Versatility: The brush back style can be easily adjusted to accommodate various settings. For a more casual look, keep the front slightly tousled. Alternatively, for a formal event, ensure your hair is slicked back neatly.
- Product Experimentation: Different styling products will yield varied finishes. Consider trying out a lightweight cream for a softer look or a stronger gel for a firmer hold, tailored to suit the occasion.
In summary, the casual brush back is not just about aesthetics; it’s a practical option that allows for personal expression while requiring minimal effort to maintain.
5.Disconnected Undercut
The disconnected undercut offers a bold, modern look that’s surprisingly easy to manage. This style highlights a stark contrast between the long hair on top and the very short sides and back, creating an edgy yet stylish appearance.
How to Achieve It:
- Haircut: Start by visiting a professional barber who understands the disconnected undercut. Request very short sides and back, ideally clippered down to a grade that suits your preference, while asking to keep the top significantly longer—this can be anywhere from 3 to 8 inches, depending on your desired look.
- Styling Product: Once you have the cut, apply a high-quality styling product suited for your hair type. A matte pomade or a styling cream works well as they provide hold without excessive shine. Use a small amount—about the size of a quarter—and distribute it evenly through the top section of your hair.
- Texturing: Use your fingers to lift and tousle the top as you style. This will create a textured, lived-in look that enhances the disconnected aspect of the cut. You can experiment with different styling techniques, such as twisting the strands or sweeping them to one side, to find a look that best suits you.
Tips:
- Pairing with a Fade: This style can be particularly striking when paired with a subtle fade on the sides, which adds an extra dimension and refines the overall appearance.
- Maintenance: Regular visits to a professional Phoenix Barbershop will ensure the look stays sharp. A touch-up every 4 to 6 weeks is advisable to maintain the clean lines on the sides and back while allowing the top to grow as desired.
- Adaptability: The disconnected undercut is versatile and can be adapted for various occasions. For a more casual day, keep the top messy and tousled, while for formal events, style it smoothly and neatly.
In summary, the disconnected undercut is not just a hairstyle; it’s a statement that embodies confidence and modern aesthetics, offering a mix of edge and elegance with minimal styling effort.
6.Messy Quiff
The messy quiff is perfect for those who want to add volume with a carefree, stylish approach. This hairstyle strikes a balance between casual and chic, making it a versatile option for various occasions.
How to Achieve It:
- Preparation: Start with damp hair, as the volume will hold better on wet locks. Apply a generous amount of volumizing mousse evenly throughout your hair. This will not only create volume but also provide structure to your quiff.
- Blow Drying: Next, use a blow dryer on a medium heat setting. To achieve maximum lift, direct the airflow at the roots while lifting sections of hair with your fingers or a round brush. Focus on the front section, ensuring it is elevated to form the quiff’s signature look.
- Styling: Once your hair is dry, apply a light texturizing product, such as a sea salt spray or light hold pomade. Using your fingers, style the hair upwards and back, tousling it slightly to create that carelessly styled effect. Feel free to experiment with the shape and direction until you find a style that suits your face and personal taste.
Tips:
- The messy quiff works best with medium-length hair, typically falling just above the ears or longer, as this length provides enough hair to work with while maintaining a light and airy feel.
- For different occasions, you can adjust the quiff’s styling—keep it more relaxed and tousled for casual outings, or smooth it out and define the edges for a more polished look. This adaptability makes the messy quiff an excellent choice for anyone looking to express their individuality through their hairstyle.
7.Slicked Back
For a refined, timeless appearance with minimal effort, consider the slicked-back style. This look is all about clean lines and a polished finish, making it perfect for both formal and casual settings.
How to Achieve It:
- Preparation: Start with damp hair for the best results. Towel-dry your hair slightly to remove excess moisture, ensuring it remains just wet enough for product application.
- Product Application: Apply a generous amount of styling gel or pomade to your hair, focusing on the roots and working your way to the ends. The type of product you choose can affect the hold and shine. For a high-shine finish, opt for a gel, while a matte pomade can offer a more subtle look.
- Combing: Using a fine-tooth comb, start at your forehead and comb the hair back towards the crown of your head. Ensure you work through all sections evenly, adjusting the pressure as needed to achieve the slicked-back effect. You can comb in a straight line for a classic look or create a slight side part for added style.
- Drying: Allow your hair to air dry for a more natural look, or use a blow dryer on a low heat setting for a more polished finish. If you blow dry, continue to comb your hair back until it’s fully set in place.
Tips:
- The slicked-back style is ideal for formal settings such as weddings, business meetings, or interviews, providing a smart appearance that exudes confidence.
- To maintain the look, regular trims are essential, as this style works best on hair that is kept neatly shaped and manageable.
- Experiment with different amounts of product to find the right balance for your hair type. Thicker hair may require stronger hold to stay sleek throughout the day, while finer hair might benefit from lighter products to avoid weighing it down.
8.Taper Fade
The taper fade is a versatile, easy-to-maintain haircut that adds both volume and flair to your overall appearance. This style is characterized by shorter sides and back, gradually transitioning to longer hair on the top, which creates a smooth, blended look.
How to Achieve It:
- Shaping the Sides and Back: Start by asking your barber for a taper fade on the sides and back, ensuring they understand your desired fade level. The hair is cut shorter at the bottom and gradually increases in length as it moves up, creating a seamless transition. The taper can be achieved using clippers, and the key is to blend the different lengths well for a polished appearance.
- Styling the Top: Once the sides and back are faded to your liking, focus on the longer hair on top. Apply a styling product suitable for your hair type, such as a mousse, pomade, or wax. Use your fingers or a comb to distribute the product evenly while styling. Depending on the look you want to achieve, you can create texture, volume, or a slicked-back effect. For added height, lift the roots with your fingers as you work the product through.
Tips:
- The taper fade can be customized to suit your preferences and face shape; you can ask for more subtle fades for a conservative look or opt for more dramatic contrasts for a bold statement.
- Consider playing with the length on top to see what works best for you; shorter styles can create a more modern feel, while longer textures can offer versatility in styling.
- Regular trims are essential to keep the fade looking sharp and tidy; every four to six weeks is generally recommended to maintain the style and prevent any awkward growth.
Conclusion
Choosing a low-maintenance hairstyle doesn’t mean sacrificing style or volume. These eight options provide a variety of looks to suit different preferences and hair types. For the best results and professional styling, visit Phoenix Barbershop, where expert barbers can help you achieve the perfect look. Discover the convenience and confidence that come with a well-chosen, easy-to-manage hairstyle.